Here's a game report from yesterdays game of Napoleons Legacy. Pics aren't up to much, particularly seeing as only one side was painted! It was a fun battle anyway and showcased the game for me and my friend.
I took Austrians.
I fielded 2 regiments of Fusiliers, 1 of Grenadiers, 2 of Jagers, 2 squadrons of Uhlans and 2 of Dragoons. I also had 3 batteries of howitzers. One Good commander and 1 average subordinate were the HQ choices.
My friend took French. He had 2 regiments of line, 1 light and 1 Old Guard. He then had 1 squadron of Hussars, 2 of light dragoons, 2 of cuirassers and 4 batteries of canons.
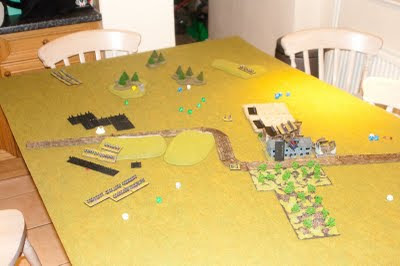
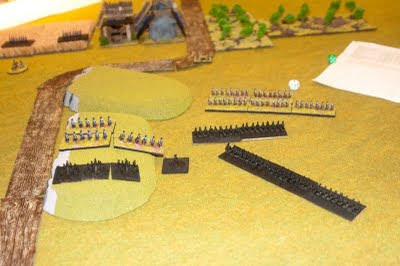
This is how we deployed

Austrians and French concentrated the majority of their line/fusiliers in the valley area along the road, pretty much in the centre of the board. Some sneaky Austrian Grenadiers reinforced the centre. The French found a sneaky hill top to set up 3 canons, and the remaining canon joined the Old Guard and light infantry on the right flank, hoping to rush to the small village and set up defences there. The cavalry were deployed on both flanks, apart from the Hussars who set up as a screen out front of the line infantry in the centre
The Austrians used their light infantry (jagers) and the majority of their cavalry opposite the French right flank to hope to contest the village and woods. The Austrians also put some uhlans on the left flank in order to fend off any flank attacks from the French dragoons. The Austrian howitzers were limbered up and deployed behind the hill that overlooked the road.
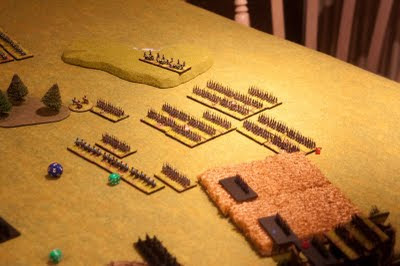
Turn 1Both sides raced for the prize of the small village area, with the French making faster progress as their fighting columns proved quicker on the move than the Austrian light infantry.
The French line regiments were more cautious and decided to sit and wait to see what the Austrians would do. The Austrians keen to seize the initiative began a slow but steady march down through the valley and up the road hoping to find a good position to attack the main body of the French army. Unfortunately the Grenadiers mistook the Uhlans on their left flank for incoming French horses and panicked (I rolled a blunder on the command table!) forming square to receive a charge that was never to come!

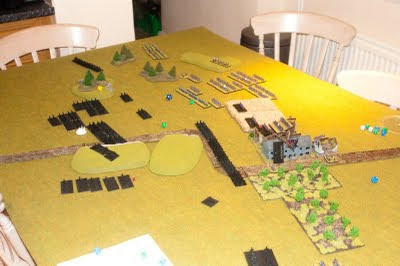
Turn 2The French main body started their steady and determined march to meet with the Austrians
The French cannons boomed shattering a squadron of Uhlans who in their panic fell back broken. Still the Austrians marched on, with the Grenadiers realising their earlier mistake and after slowly reforming they began to advance. The Jagers had managed to make it to the road in front of the village but found they had been beaten there by the Old Guard and the Light Infantry. They formed a firing line but it was futile as the well dug in French opened fire driving the hapless Jagers back in disarray and panic, leaving behind scores of dead. They also found the French had snuck a small battery of cannons onto the main road by the village and fell victim to some excellent French gunnery.
Turn 3Things took a turn for the bloody for the poor Austrians. A regiment of Line infantry was decimated as 3 French artillery batteries opened up over and over again, leaving bloody furrows amongst its ranks. Overcome at so many dead the regiment dissolved in chaos and fled (at this point we had misread the artillery rules and they were the equivalent of tac nukes!- we realised after this turn but carried on with the board as it was, it was just a test game after all).
The Austrians main thrust was looking weak as the second fusilier regiment was forced to fall back under French fire. Only the Grenadiers were stalwart and continued their advance.
The Austrian howitzers now in position opened fire and decimated a French line regiment (again we over powered them!) , but the valley area was looking increasingly like it would see a French victory.
The village was still convincingly held by the French and the Jagers could do little more than fall back and reconsider. To their right opposing cavalry skirmished about to little effect, feinting and counter charging in a fine display of horsemanship for very little real result. A squadron of French hussars seeing a break in the field threaded down the road to pounce on the demoralised Jagers.

Turn 4 and 5
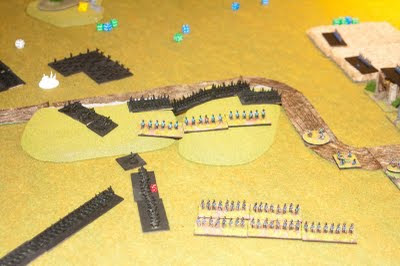
The increasingly confident French line in the centre of the valley threw themselves forward sure they could smash the lone regiment of Grenadiers , and their confidence proved correct. Excited by their victory as the broken Grenadiers fled over the bodies of their comrades, the French continued their advance towards the final Fusilier regiment at the mouth of the valley.
Their confidence was their undoing.

Suddenly the cliff tops and hillsides bordering the roads were thronged with Jagers and howitzers. Musket fire and case shot rained down onto the furthest forward regiment, causing utter carnage. As they fled, new targets came into sight and they too took a beating.
The Fusiliers sensing their moment surged forward with a roar and in a cloud of musket fire, charged into the disordered French smashing them apart. A unit of Jagers holding back in reserve behind the hillside joined them in their fight, and the central valley area was now well and truly Austrian.
Turn 6The Jagers on the cliff top were short lived in their jubilation. The screen of Dragoons that were protecting their rear from any attacks by the squadron of French Hussars who were lurking around the village area decided that they had better things to do, and before the Jagers knew it the Hussars were on them hacking and slashing. Caught between the frenzy of the Hussars blades and the edge of the cliff there was only one outcome likely. The Jagers were cut to ribbons, and those who tried to flee tumbled to their doom down the rocky slopes and drops.
Not content with their slaughter the Hussars with a blood lust that overcame any sense, turned their attention to the howitzer batteries. Their first attack was repelled by a cloud of smoke and case shot tearing threw them, but their danders were up and they rallied and turned again on the artillery crew, and were soon among them. The guns were spiked and the Hussars again victorious.
Sensing the tide on the right flank turning, 2 squadrons of Cuirassers, who had been doing little decided to join the fray, charging the luckless Austrian dragoons, who seeing the sun glinting on the french breastplates thought better of it and fled.
Turn 7With the right flank dissolving, the village securely held, and the central area held by the tattered remains of 2 regiments, the Austrians withdrew, leaving Napoleon once more the victor.